It's not very often I share an 'in process' picture, but I goofed up majorly on this one, so I'm sharing in hopes that you won't make the same mistake. And just for your entertainment too.

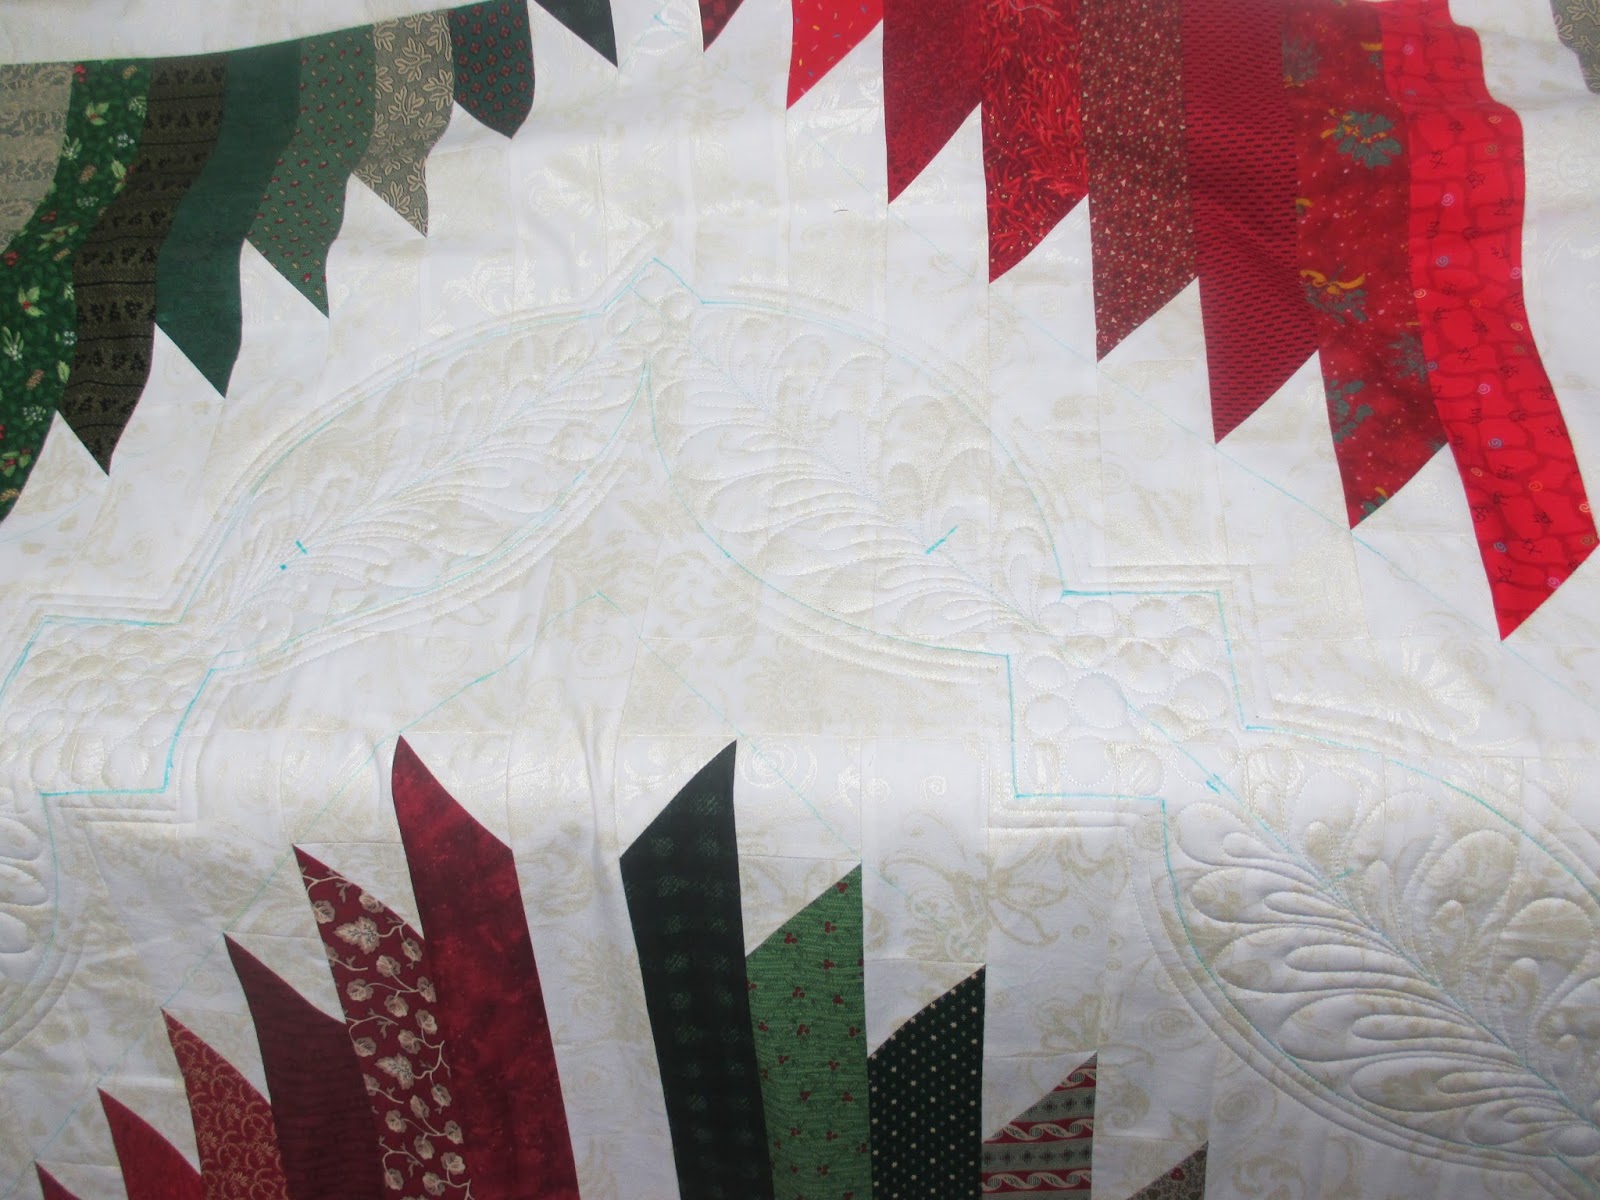
Teresa made this beautiful quilt 'Lost City' in Christmas fabrics. Lots of negative space to think about here. After much deliberation, I decided on a fancy design, marked it out and got to work. I quilted the first part -the two shaggy moutains on the bottom, then advanced the quilt to do the next white area. Then rolled it back to fill in the backgrounds and realized I had made a big mistake.
way too much extra fabric below! Imagine rolling up a magazine from the spine about halfway then putting a few staples into it. When you unroll it, it will not lay flat. The same thing can happen with quilts. This was going to be too much for me to try to work in, so I had to rip it out.
2 hours later all my stitches were gone from the top part of the quilt. I unzipped it from my leaders and laid it on the floor and smoothed it out as best I could. A good 1.5 inches difference!
I pinned the layers together across the top, put it back on the longarm and stitched the top back down in it's new shifted position. Then I re-quilted the top part and from then on it was smooth sailing.
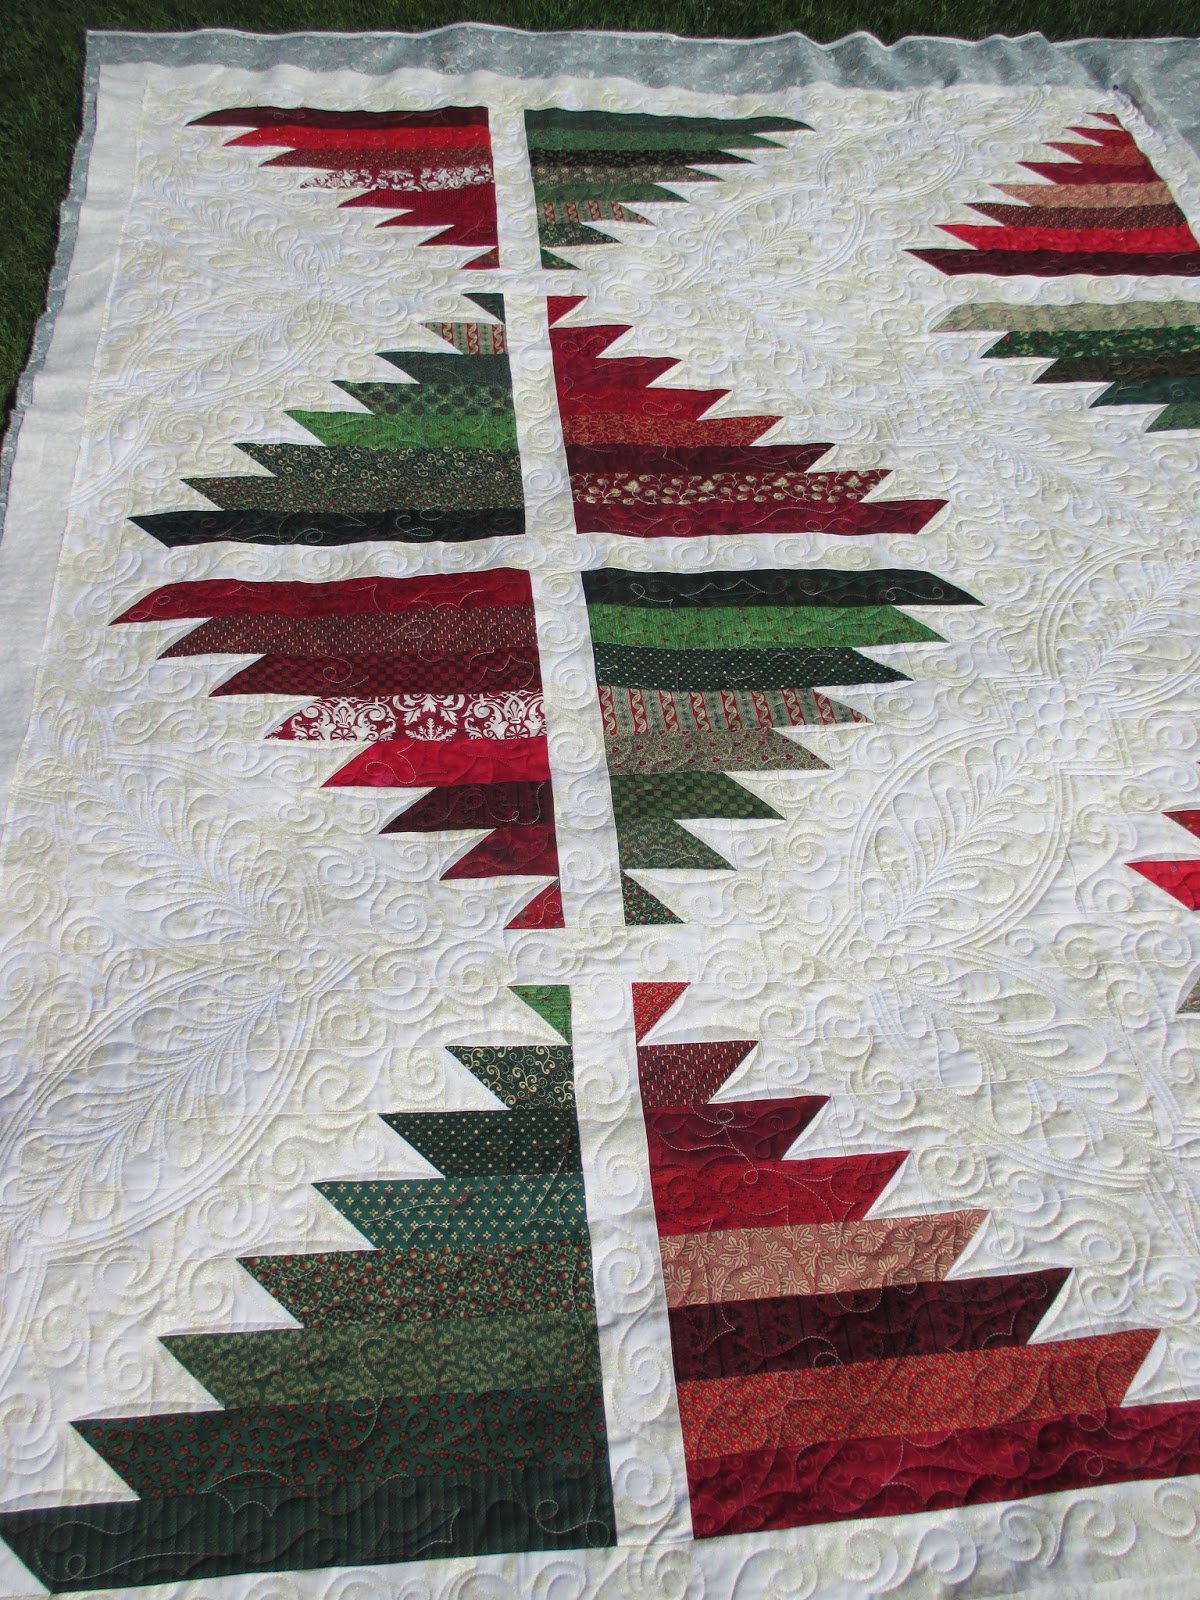
Here it is all finished!
I c2c'd around the jagged mountains...
...and filled in with swirls. Then with red, green and white variegated thread I filled in the red and green areas with a holly leaf design.
To find the center of the design, first I drew a straight line along the points-top and bottom. Then I measured across and then drew another line through the center- about 5 inches from the sides. Then I laid out my cut out curved shapes and played around with them until I came up with this design. The length in this section was too long for 2 curved shapes, but not long enough for 3. So I ended up putting them towards the corners and filled the leftover gap with a square shape.
Ta DAA!