Tutorials

Saturday, November 20, 2010

Another Baby Quilt...


...this time in blues.


Once again I quilted something different in each block.  I also washed and let it lay flat to dry.  I usually don't do this before I gift a quilt away, but this time I did.  I like the fresh, clean and crisp look of it before it gets all wrinkled and crinkled. 


The back is flannel.  I inherited some binding scraps and this red piece was the perfect length-not only did did I not have to sew another strip on, but I didnt even have to trim it at all!  How crazy is that?

Monday, November 15, 2010

A quilt in progress...


This weekend I was motivated enough to start a new sewing project.  I've been wanting to make this quilt tutorial from Red Pepper Quilts for a while and once I started piecing 1.5" strips, I could not stop. 


Boom.
42 Blocks.
Done.


And I still have plenty of pieces left over.  The plan is to use these up in a border. 

Thursday, November 11, 2010

Heritage Squares


This quilt was made by my fiercely quilty family for a cousin's wedding.  It is super scrappy!  We actually made this in a weekend sewing extravaganza, but we each came with a handful of blocks already pieced plus some ready to assemble- so we might have cheated a little bit.  OK- Actually even with the "cheating" we just barely got all the blocks made and laid out onto the floor by the time everyone had to leave.  But then I spent the next couple weeks tweaking the layout; shuffling a block around here and there, looking at it without glasses or contacts, in the light, in the dark, squinting really hard, looking from the corner of my eye, from close up, and from a distance to try and get the lights in the center, darks in the 2 opposite corners, and then the mediums in the opposing corners.  It took some time and effort but I think the resulting effect was well worth it.


Looking at these pictures now, I still see some blocks that perhaps should have been switched around.  But it got kinda tricky because we had duplicates of some of the pieced blocks, and some of the spacer squares were repeats too, so making sure that no 2 fabrics were next to each other got challenging after a while. 


For the quilting I did wiggle-waggle-loop-loop-loop, and repeat.  I stayed in the dark parts and left the little light squares unquilted which resulted in a somewhat trapuntoed effect. 

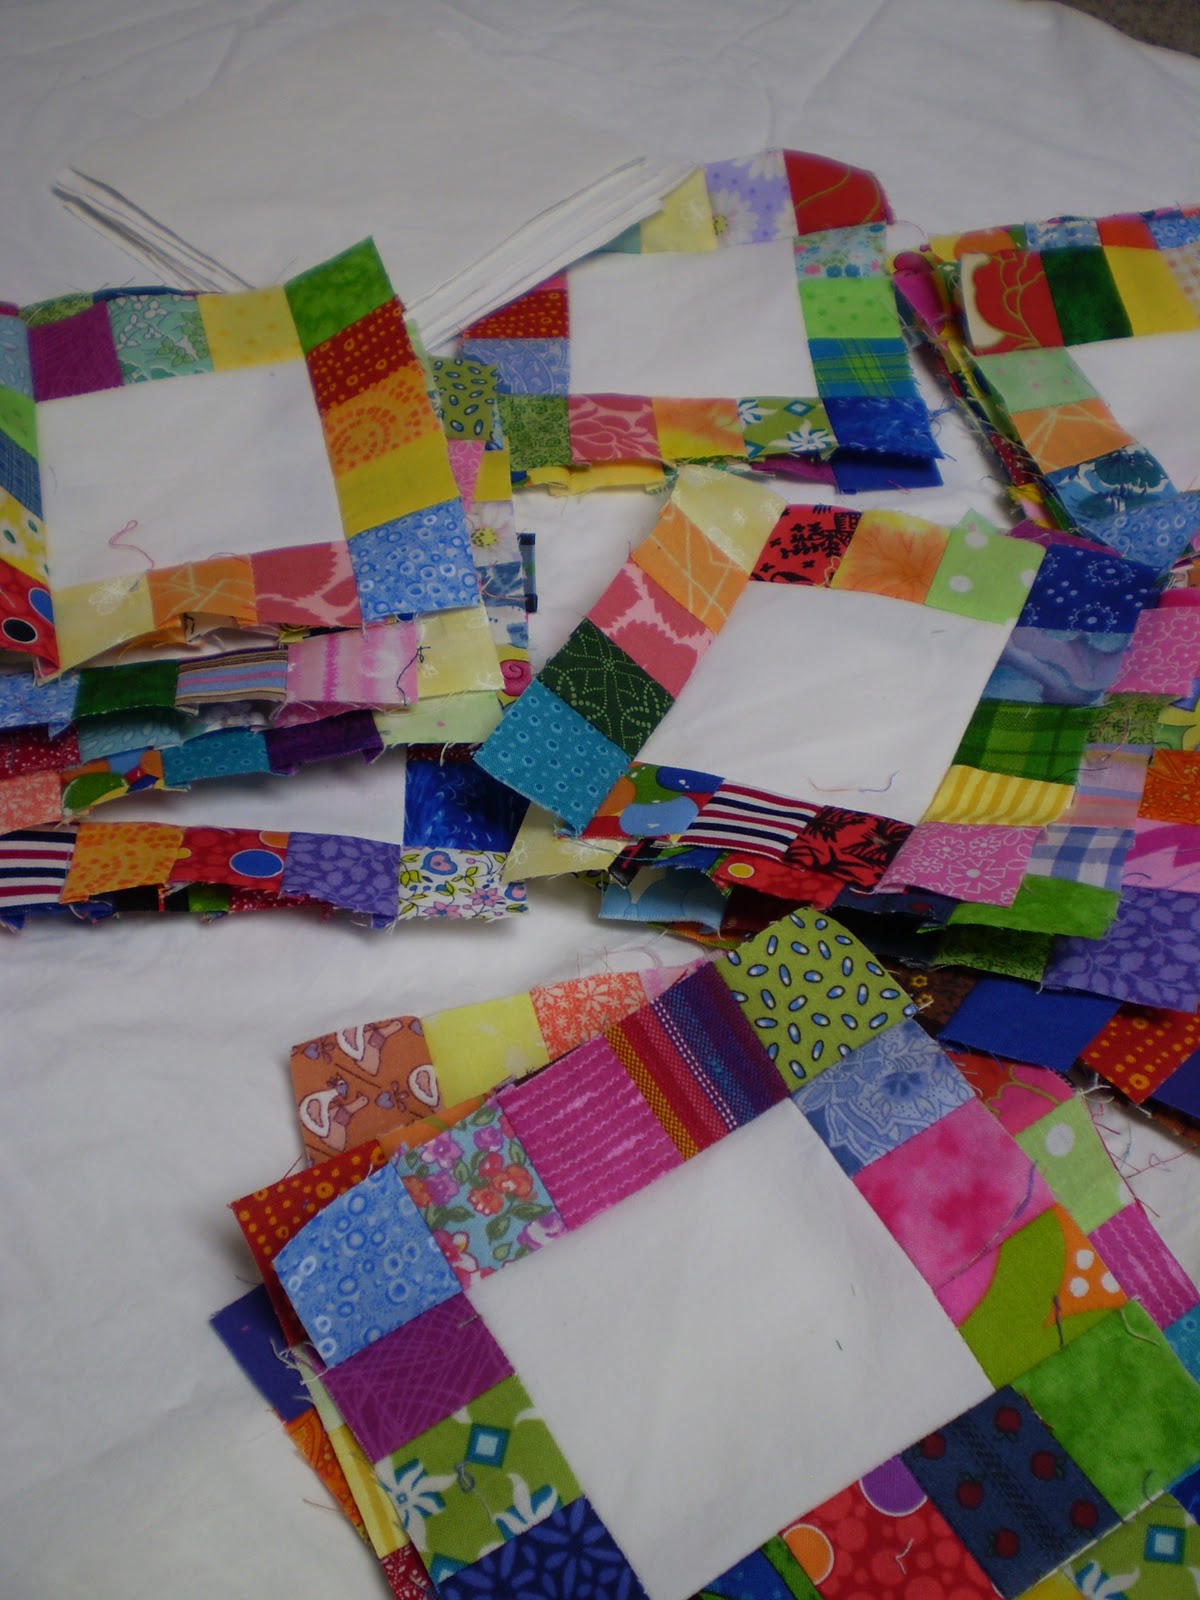
To give you an idea of the scale- the spacer blocks were 5 inch squares and the littler white squares are 3/4 inch squared finished.  This Heritage Squares pattern was featured in the Sept./Oct. 2005 Quiltmaker magazine.  I really love how it turned out- as did the bride and groom.  I kinda want to make another one now.  :)

Thursday, November 4, 2010

Constructive Criticism


This is my entry for the Blogger's Quilt Festival

I bought a jelly roll of Kaffe Fassett fabrics and then had a hard time figuring out what to do with it.  Flipping through a Connecting Threads catalog I came across this pattern called Sweet Nothings.  I was going to order the pattern when Mom says "Oh, You can just figure it out and make your own pattern".  yeah, what kind of quilter am I when I cant even make my own pattern?!  So I drew it out and made this.  There were 50 different fabric strips and each strip made 2 blocks.  There was 1 duplicate block that was extra.  I quilted swirls all over and stayed up late sewing the binding on so that I could enter it into the county fair.  I stayed to hear the judges comments, which was... humbling.  She could tell that I did the binding in a hurry because my corners were not very crisp and neat.  But i did manage to get a blue ribbon!  And I made a point to learn how to make better binding corners from then on.  :)

Monday, November 1, 2010

For Sewing on the Road


I've been wanting to make a little sewing kit to hold all those little supplies to make it a lot easier to take projects along with me.  I nabbed these Kaffe Fassett fabrics at the AQS show a couple weeks ago with this project in mind.  It was a difficult task finding the right button.  My selection is a bit limited and green one was the perfect color, bit it just was not big enough.  So I stacked it on top of a bigger one.  Then I realized that I would have to stitch it on INSIDE the little pocket...


A little tricky.  I used Rae's pleated pocket tutorial.  The left side features a bit of ceiling fan chain to use to thread a spool of thread or bobbin onto. 


And everything gets snapped in with a couple flaps of felt and some sew-on snaps.  I wouldnt play hacky-sack with it, but I don't think anything is going to fall out with the normal tossing about.  Unfolded it measures 5.5 by 12 inches.