Tutorials

Tuesday, September 29, 2020

Wade's Disappearing Pinwheel


This quilt was one my family made together for my cousin once removed, or my Mom's grand-nephew/Wade's great-aunt. Or, just Wade. 😁 I had to look up the official terms, but this is for Wade who just graduated high school.


But, in all actuality, I think my Mom made about over 90% of it herself. This pattern is a Disappearing Pinwheel variation using 10" squares-a layer cake plus some of her stash. Wade is a pretty tall dude.


I quilted the outer border in a wheatgrass design and all-overed the rest with half feathers, leaves, swirls and other various things.


A peek at the back. A leftover block that ended up too small for the front and a strip of extra stacked coins tie it all together nicely.

Love how it turned out Mom! We have a few years (I think!) before the next one graduates on that side of the family, but then several of my cousins hit a baby boom, so we might have to get a head start on those!
Any reason to get together and sew, we'll gladly take it! We have so much fun making them.


Friday, September 25, 2020

Soccer T-Shirt Quilt


Denise made this T-shirt quilt for her son who just graduated high school.


Not sure how I managed to not crop out my bare feet from the pictures, but ah well. 


I decided to go with red thread on this one.


I love to outline the shirt designs and fill in the rest with a few different fills.


Thanks so much Denise!


Tuesday, September 22, 2020

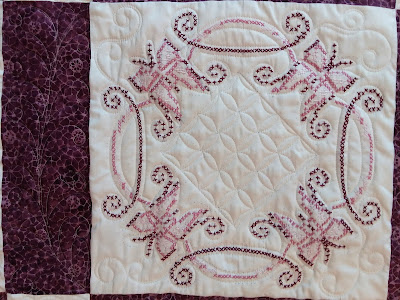
Norene's Embroidered Butterflies-FANCY!


Norene put together this beautiful quilt made with butterfly embroidered blocks. 


I used a thin white thread throughout the quilt. 


It is super hard to see, but in the outer border, I quilted flowers, and in the purple sashings, I quilted a curved feather.


The embroidered blocks were fairly simple. Once the embroidery was outlined, and the open corners were filled with a couple curls, all that was left was the center area.


The center area was already marked with grid lines. I was given permission to quilt whatever I pleased, but decided to go ahead and use those marks for c2c. Why not? Plus, I couldn't think of anything better to quilt there besides a feather wreath.


The same flower design in the border went into the cornerstones.


I alternated curls and feathers.


I made sure the feathers fully circled around the center blocks. 

Thanks Norene! I love how this one turned out- it's so purdy!


Thursday, September 17, 2020

Meg's Rail Fences


Meg made this fun rail fence quilt.


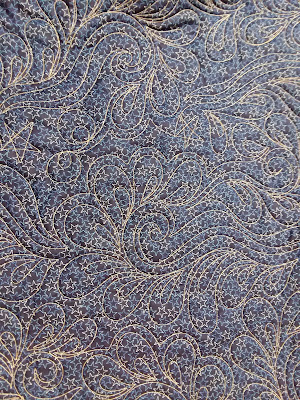
I quilted an all-over design of big paisley swirls and filled in the tight areas with a few stars and circles.


A peek at the back.


Thanks Meg!


Monday, September 14, 2020

A couple Do.Good. Stitches blocks, T-Shirt Quilt

 
Here I have a couple of blocks from my do.Good Stitches Nurture circle from a few months back. This one was an Around the World in red, white, blue and gray using 2.5 inch strips.


The request for this block was any 12" block inside of a square in a square block using jewel tones. I wanted to use my Quick Curve Ruler and found a block I liked from their free tutorials-Chic Stars. I had to make my pieces a bit bigger as the pattern finishes at 11 inches. I added a half inch to the pieces and it made the block plenty big. Too big almost! I ended up trimming quite a bit of the turquoise fabric off, but the design still fit, so it was successful nonetheless. 


Joyce made this T-Shirt quilt for a high school graduate.


I chose to use a cobalt blue thread.


I did my usual of all-over swirly designs and custom outlined the shirts.


Thanks Joyce!


Thursday, September 10, 2020

Cindy's Log Cabin


Cindy made this awesome log cabin quilt.


I covered it in feathers. Longarm feathers in the big border, little feathers in the little border...


...And more undulating free-form feathers in the blocks.


A couple peeks at the back. 

When doing the big feathers in the center, I start with a large meander from one end to the other, then, work my way all the way back down the spine on one side. Then I work my way back up on the other side. So I will go over the area three times back and forth, ending on the opposite end from where I started. After I advance the quilt, I start the process over again, this time going in the opposite direction- starting on the same side I ended up on. 


And fill in every nook and cranny along the way!
Thanks Cindy.