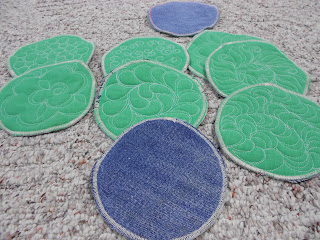
This house was very much in need of some coasters and has been on my "To Sew" list for a while. This is a fairly quick project. From pulling out fabric to the last snip I think it took me less than 2 hrs.
There may be a better/prettier way to do this, but this is how I made them: First I loaded up my longarm machine with a flannel back (I used an old sheet), cotton batting and then my top fabric. (Cotton because it is way more absorbent than polyester. And the flannel back because again, more absorbent and in the end I wanted my coasters to be thick and sturdy.) I used a CD as my template for the circle. (When I stitched my circle, I wasn't even concerend about it looking perfect because it is not going to be seen anyway.) Then quilt as desired. I tried to stay a 1/4 inch away from the inside edge of my circle.
Cut out your coasters.
Then to give them some weight I used some old jeans for the back. Zig-zag stitch all the way around the edge then carefully cut off the excess denim, making sure not to slice through your stitches. But if you do, just re-zig-zag over it.
My original plan was to sew the denim wrong-side-up to the mini quilt, leaving a small space, then flipping them right-side-out and then top stitching all the way around the edge, but that was going to be pretty hard on my machine and way more time consuming. So zig-zagging the edge worked out much better. But if you were to use a normal weight fabric instead of denim, I think that method would have a better finished look.
Ta Daa! Lots of lovely coasters! It's a good way to use up little batting pieces and scraps of fabric, which I have plenty of.
And, now your guests can admire your nice quilting!


1 comment:
Love the coasters.
Post a Comment